Part 2 of TyTe's 3-part series on Sound Checking for Beatboxing.
Once you have connected your microphone to your interface or mixer (Part 1) it is time to set the level. Here is how you do it.
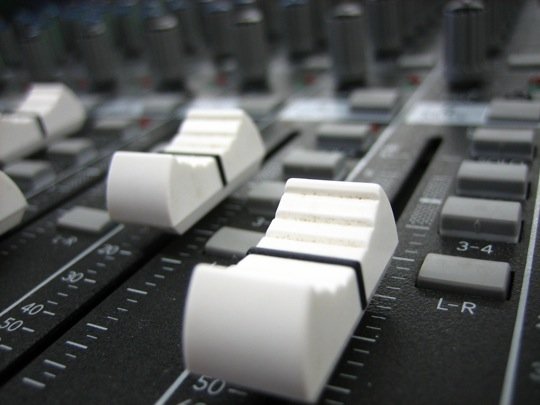
1. Check that the output fader is down
Before you do anything, make sure that the output fader on the input channel on the mixer is down, or if you are monitoring on a digital interface, that the monitor output is turned down. We connect and check the sound levels of a microphone with no audible output.
2. Connect the microphone
You connect your microphone to your mixer or digital interface using a female XLR to male XLR cable.
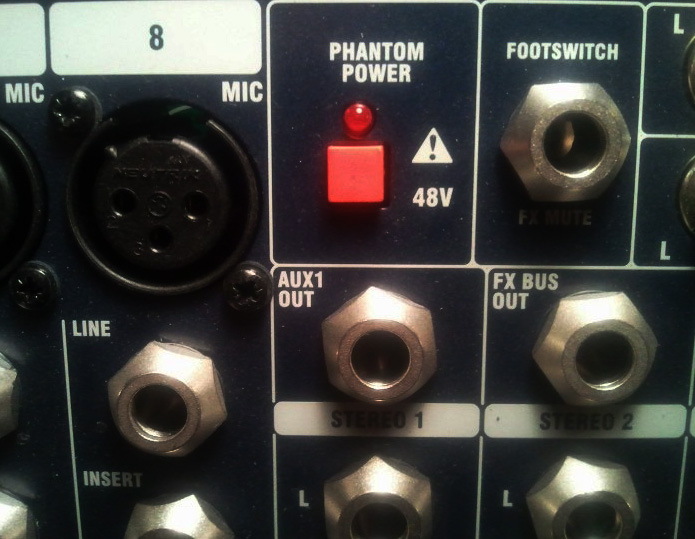
3. Check the +48V Phantom Power button is set
If you are using a condenser microphone you will need to check that the +48v phantom power button is selected. If you are using a dynamic microphone you will need to check that this button is not selected. This latter step is not required but for neatness sake let’s not have something turned on that we do not need.
4. Beatbox at full volume
Beatbox into the microphone as loud as you are ever going to be. Do lots of kick drums, lip oscillations and bass! It is important that you beatbox at your loudest level so that when performing or recording you will not distort.
5. Turn off any 100Hz filter buttons
More expensive mixers and interfaces have a 100Hz high-pass filter button, usually just below the Gain knob. This cuts out any unwanted low frequencies such as stage rumble or mic pops. Beatboxers love rumble and sub-bass and so make sure this button is not selected!
6. Set the gain
The Gain knob on a mixer or digital interface controls a small amplifier that gets the electrical signal from the source at the right operating level for the mixer - not too loud and not too quiet.
On some more expensive mixers you will see a full LED meter on the input channel, others have three LEDs - green, orange and red on the input channel and on cheaper mixers or interfaces just a single red (overload) LED.
If you have any kind of LED meter on the input channel, whilst beatboxing at full volume, turn the Gain knob such that it is set as high as it will go without the red LED(s) lighting up.

If your mixer does not have any sort of meter - no LEDs on the input channel, then it will probably only have an output or master LED meter. You can monitor your input channel by sending the signal to this meter using a a PFL (Pre-Fade Listen) button. The PFL button on most mixers is near the bottom of the mixer by the fader. The procedure is the same. Press the PFL button, beatbox as loud as you can and adjust the Gain knob so that the level is as loud as it can be without going into the red. Do not forget to deselect the PFL button once the Gain is set.
Note: The reason for getting the level as loud as you can without going into the red is to get a good signal-to-noise ratio.
Note: If you get no sound level at this stage then you need to check the microphone, cable and that the cable is plugged into the correct input channel on the stage/wall box or mixer.
7. Turn up the fader
Now the gain is set you can now turn up the fader and listen to the beatboxing.
8. Adjust the EQ
EQ (equalisation) changes the frequency, shape or tone of the sound. If you are recording then you will probably want the EQ flat - i.e. no EQ - as you will adjust the EQ when you playback and mix.
Some more expensive mixers have a bypass control on the EQ section. This is useful for two reasons. Firstly, it means you do not want to use EQ you can bypass the circuitry reducing the possibility of any unwanted noise being introduced in the signal path. Secondly, you an set any EQ you want and then use the bypass button to compare the sound with and without EQ.
If you wish to use EQ and the mixer has a bypass button check that it is not selected! As a very general rule, on a good sound system with a good microphone you will need little in the way of EQ. However, it is common for beatboxers to keep the mid frequencies flat and add a small +3dB boost to the LF (low frequencies) and HF (high frequencies).
Note: Excessive use of EQ can cause feedback, however, if possible you should not use EQ to combat unwanted feedback. If you are struggling with unwanted feedback then there is either a problem with the position of the speakers/monitors or the level of the microphone is to high for the system. Try changing position, turning down monitors, changing the microphone for one with different directionality, or turning down the mic level before using EQ to fix the problem.
9. Set up foldback
Once the gain is set and the sound is good you can now set up any foldback that is required. If you are performing in a small theatre or school then it is unlikely that you will need foldback. In the studio, foldback will be useful if you need to hear the beatboxing with other instruments or a backing track on headphones.
Setting up a foldback mix is slightly beyond the scope of this article, however, here is a brief heads up.
The input channel that you are using on the mixer will have one or more auxiliary sends. These are knobs that send signal down an auxiliary channel than can be sent to a separate output on the desk - to external effects or to foldback. Auxiliary sends come in two flavours (and sometimes have a switch to switch between flavours). You may need to refer to your mixer manual to determine what flavour auxiliary your mixer has. The two flavours are pre-fade and post-fade. Pre-fade means the signal is sent before the fader. Post-fade means the signal is sent after the fader. Typically, if you have two auxiliary sends, the first one is pre-fade. For foldback you want to use pre-fade! You do not want the level of the fader to affect the level in the foldback monitors or headphones.
Each auxiliary channel has a master level control knob. This will control the overall level of the foldback mix to the headphones or stage monitors.
Summary
Setting the gain properly is essential for good sound. Remember, you want the signal level in the mixer to be as loud as possible without going into the red. If the gain is too high then the sound will distort. If the gain is too low then you will have a poor signal-to-noise ratio. In other words the level of the background noise (hiss) compared to the level of the beatboxing will be high and you will hear it.
You are now ready for Part 3 - The Sound Check!